Green Data Centers – How to Choose an Eco-Friendly IT Partner?
A Guide for Companies Looking for IT Providers Using Energy-Efficient Infrastructure and Renewable Energy
 Author:
Hi, today as Innokrea, we’ll expand on the last topic about using GitHub Actions. We’ll attempt to deploy our simple application and demonstrate the advanced options available in our workflows. Be sure to read our previous articles on Actions, Terraform, and DevSecOps. We’ll also show you how to combine knowledge of Terraform to create a cloud environment where we can deploy the application prepared in the previous article. All files are available in our GitLab repository.
Let’s start by creating a simple test for our application. This test will check whether the message returned on the main endpoint is correct. The test will be created in the index.test.js file within the app folder.
const request = require('supertest');
const { app } = require('.');
let server;
beforeAll(() => {
  server = app.listen(0);
});
afterAll(() => {
  server.close();
});

describe('Main Endpoint', () => {
  it('should return "Hello, World!" if RESPONSE_MESSAGE is not set', async () => {
    const response = await request(server).get('/');
    expect(response.status).toBe(200);
    expect(response.text).toBe('Hello, World!');  // Check that the response body is "Hello, World!"
  });

  it('should return custom message if RESPONSE_MESSAGE is set', async () => {
    process.env.RESPONSE_MESSAGE = 'Custom Message';
    const response = await request(server).get('/');
    expect(response.status).toBe(200);
    expect(response.text).toBe('Custom Message');
  });
});
Next, let’s modify the workflow prepared earlier, add a step to run tests in our code, and change the name of the workflow and our job.
name: Test & Deploy
on:
  push:
    branches:
      - main
  pull_request:
    branches:
      - main
jobs:
  test:
    runs-on: ubuntu-24.04
    steps:
      - name: Checkout code
        uses: actions/checkout@v3
      - name: Set up Node.js
        uses: actions/setup-node@v3
        with:
          node-version: 18
      - name: Install dependencies
        run: npm install
      - name: Test the code
        run: npm test
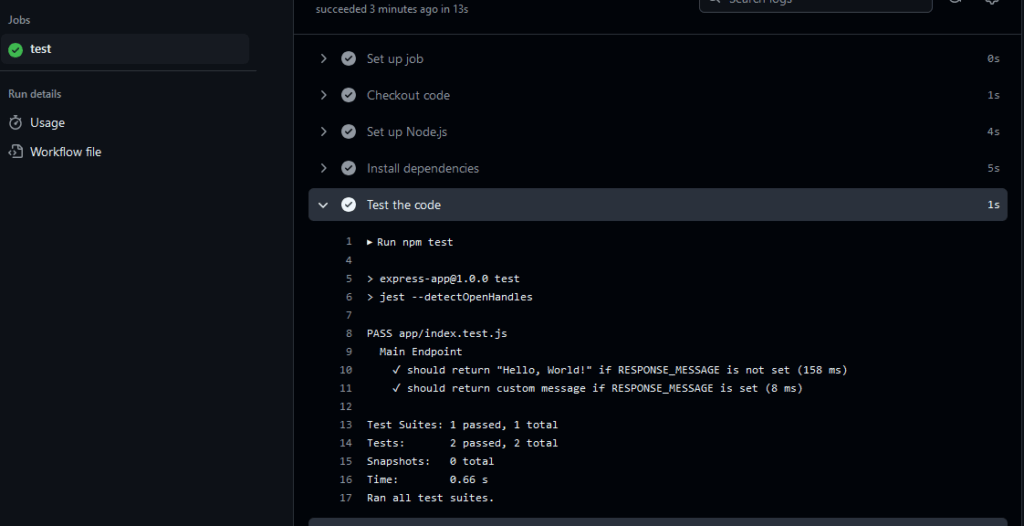
Figure 1 – Workflow Successfully Executed
The tests should pass without any issues, and the entire workflow should appear green in GitHub.
Let’s start by creating an S3 bucket in the AWS public cloud to store the .tfstate file for Terraform. This approach allows us to share the state between our GitHub Actions and local environment, as well as with other developers. The state should not be stored in a shared repository but rather as a single file on a shared S3 instance. After creating the S3 bucket, we will write a Terraform script that, as part of a GitHub Actions workflow, will create an EC2 server where we will later deploy our express.js application.
Let’s begin by creating an S3 bucket in AWS, as shown in the screenshots below.
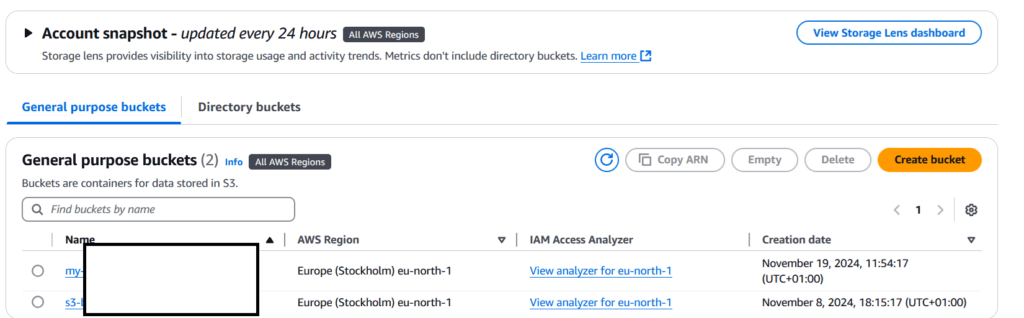
Figure 2 – AWS Console Where We Create the S3 Bucket
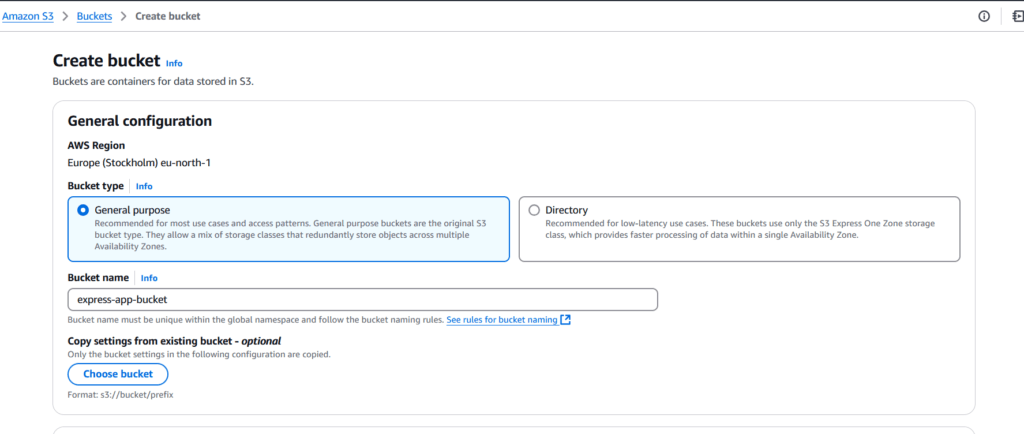
Figure 3 – The Process of Creating the S3 Bucket, Named express-app-bucket
We leave all settings at their defaults and click “Create” at the bottom of the console. Next, to access this S3 bucket, we will also create a service account in the IAM module. This module is used for managing accounts, roles, and groups in AWS.
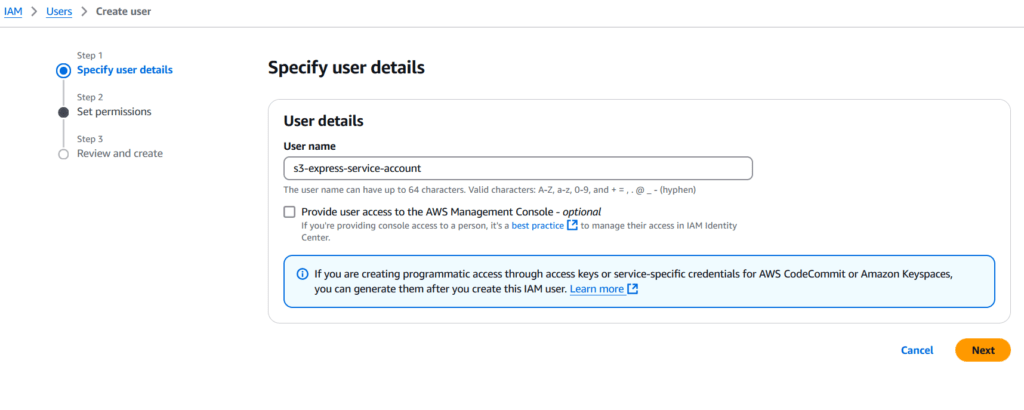
Figure 4 – Service Account Creation Process, Selecting a Name
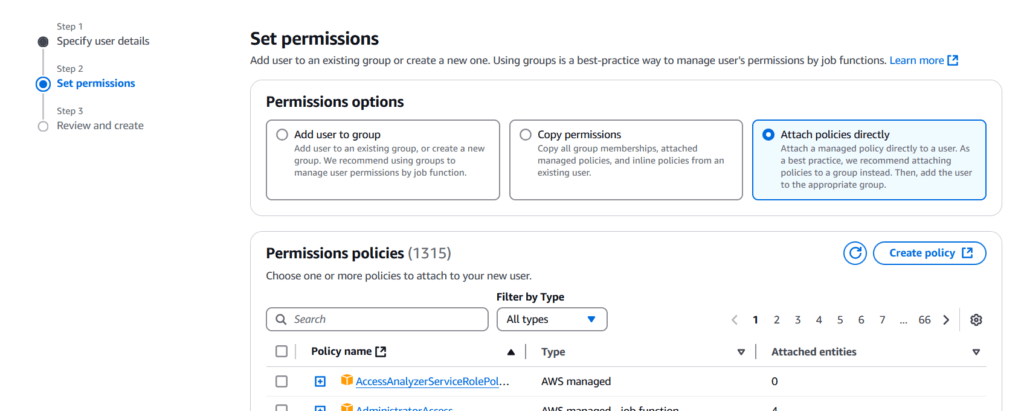
Figure 5 – Selecting a Policy Directly Attached to the Service Account

Figure 6 – Creating a New Policy with Granular Access to Only the S3 Resource – To apply the policy, you will need to provide the name of your own S3 bucket. The code for this policy can be found in the file infrastructure/s3_policy.json.
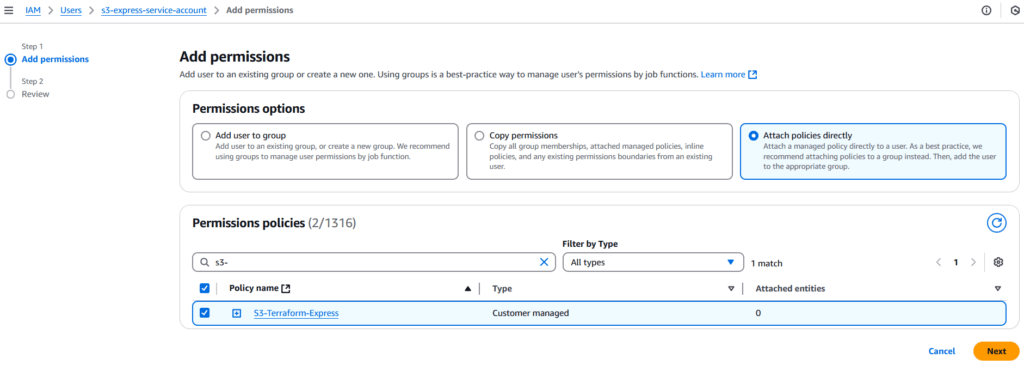
Figure 7 – Returning to Service Account Creation – We should attach the created policy to the account and also add AmazonEC2FullAccess to enable the creation of a new EC2 server instance where our application will be deployed.
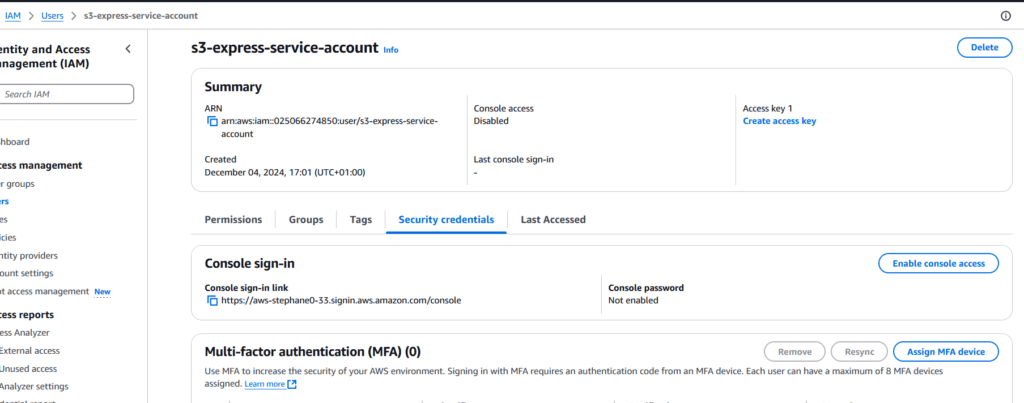
Figure 8 – Summary of the Created Account Settings – Now, we need to create security credentials that will be used in GitHub Actions. Click “Create New Credentials.”
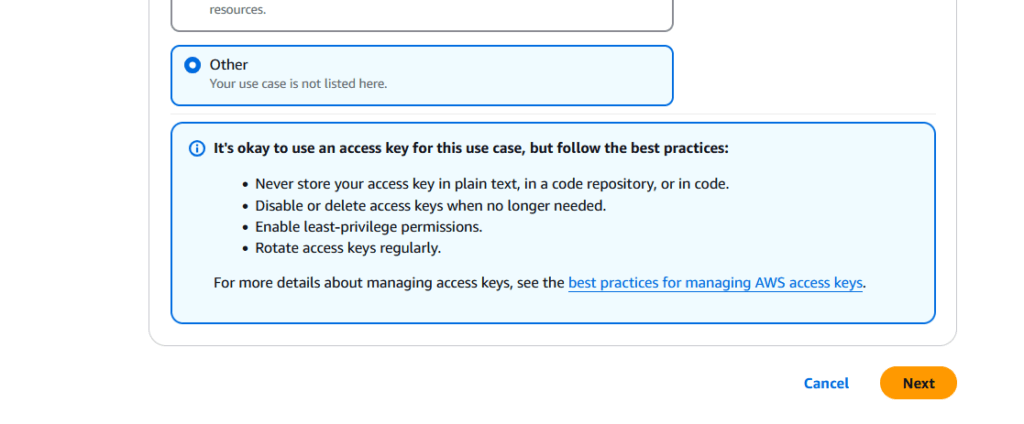
Figure 9 – Select “Other” and Click “Next,” Then Download the Credentials to Your Computer
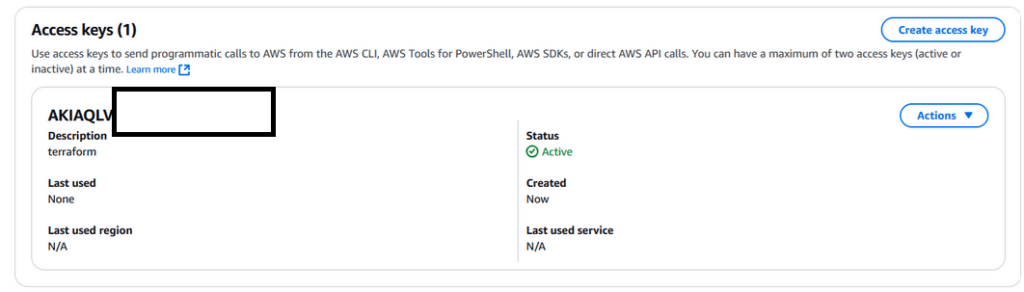
Figure 10 – Created Login Credentials Visible in the AWS Console

Figure 11 – If You Want to Use Terraform Locally – You can configure the account in the terminal using the aws configure command and entering the previously downloaded credentials. It’s worth doing this to test your configuration.
We already have a configured AWS service account and an S3 bucket for Terraform’s state. Next, we need to create a pair of SSH keys that will be uploaded during the creation of the EC2 resource in AWS using Terraform. For this, we will use the ssh-keygen program.
ssh-keygen -t rsa -b 4096 -f ./id_rsa
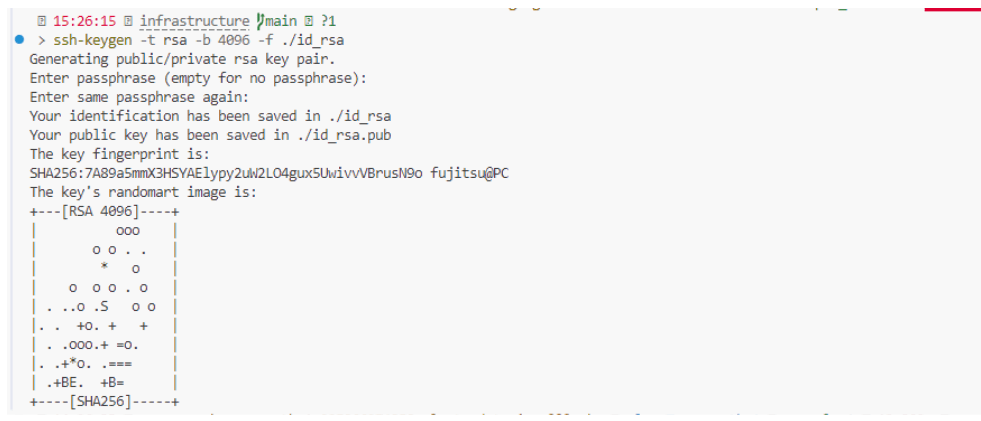
Figure 12 – Generating SSH Key, View from the infrastructure Folder in Our Created GitHub Repository
Using the AWS Terraform provider documentation, we create the main.tf file in the infrastructure folder where we will place all our configuration. We will create an EC2 resource with a Security Group allowing HTTP and SSH traffic from within the Terraform code. For storing the Terraform state .tfstate file, we will use the previously created S3 bucket.
# Define AWS provider
provider "aws" {
  region = "eu-north-1"
}

terraform {
  backend "s3" {
    bucket = "express-app-bucket"
    key    = "terraform.tfstate"  # The location within the bucket
    region = "eu-north-1"                  # Your desired AWS region
    encrypt = true
  }
}


# EC2 Key Pair
resource "aws_key_pair" "deployer_key" {
  key_name   = "github-deploy-key"
  public_key = file("./id_rsa.pub")
}


# Security Group
resource "aws_security_group" "express_sg" {
  name        = "express-app-sg"
  description = "Allow HTTP and SSH"

  ingress {
    from_port   = 80
    to_port     = 80
    protocol    = "tcp"
    cidr_blocks = ["0.0.0.0/0"]
  }

  ingress {
    from_port   = 22
    to_port     = 22
    protocol    = "tcp"
    cidr_blocks = ["0.0.0.0/0"]
  }

  egress {
    from_port   = 0
    to_port     = 0
    protocol    = "-1"
    cidr_blocks = ["0.0.0.0/0"]
  }
}


# EC2 Instance
resource "aws_instance" "express_instance" {
  ami           = "ami-05edb7c94b324f73c"
  instance_type = "t3.micro"
  key_name      = aws_key_pair.deployer_key.key_name

  security_groups = [
    aws_security_group.express_sg.name,
  ]

  tags = {
    Name = "express-app-instance"
  }
}

output "instance_public_ip" {
  value = aws_instance.express_instance.public_ip
}
If we previously configured our cloud using aws configure, we will be able to run the following command.
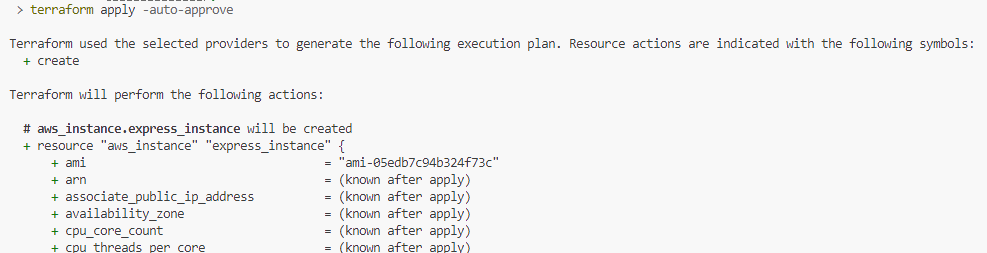
Figure 13 – Running the Terraform File from the Terminal – Terraform informs us that the resources will be created in the cloud. We should be authenticated as long as we previously ran the aws configure command.
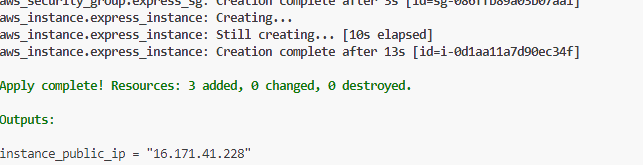
Figure 14 – After Creating the Resources, We Should Receive the IP Address of Our EC2 Server on the Screen

Figure 15 – Logging Into the Server Using Our SSH Private Key
We have successfully created infrastructure in the AWS public cloud using Terraform code. Now, let’s destroy the resources using the terraform destroy command, so we can later use the workflow to recreate the entire infrastructure. To do this, we will add the previously retrieved AWS secrets to GitHub using the GitHub Secrets functionality. This feature is used to store secrets within GitHub. Once a secret is added, it cannot be read from the UI, but it can be used within the GitHub Actions runner.
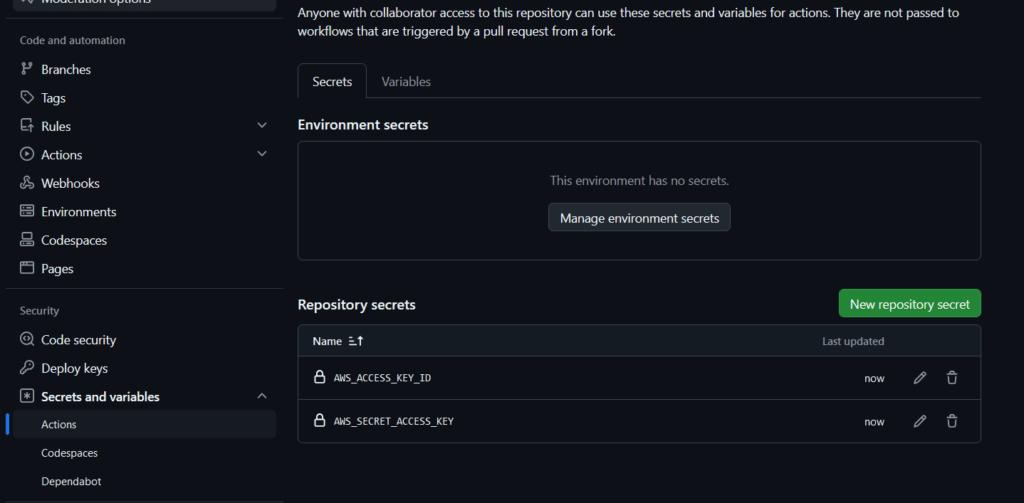
Figure 16 – Adding AWS Secrets to GitHub Secrets
We also need to add the private key to the secrets in order to log into our server during the application deployment. The public key is stored within the repository and will be installed by Terraform when creating the resources in the AWS cloud.
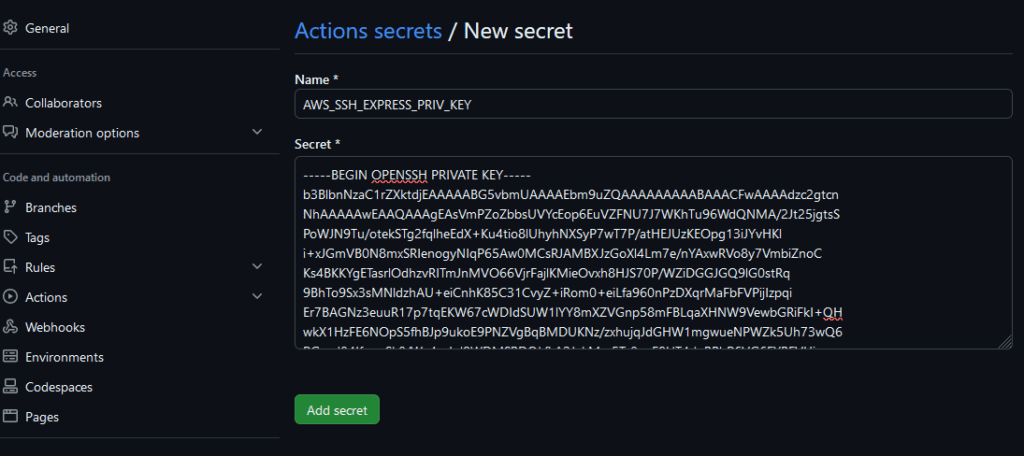
Figure 17 – Adding the Private Key, Which Will Be Used to Log into the EC2 Instance and Deploy Our Application in the AWS Cloud
Now, let’s prepare a workflow that uses Terraform and the secrets saved in our secrets manager. The workflow will be executed manually and will utilize the secret object at the job level. We will use Terraform commands to fetch the Terraform provider, generate a plan, and then deploy it to the AWS cloud.
name: Terraform Deployment
on:
  workflow_dispatch:

jobs:
  terraform-deploy:
    runs-on: ubuntu-24.04
    env:  # Declare environment variables at the job level
      AWS_ACCESS_KEY_ID: ${{ secrets.AWS_ACCESS_KEY_ID }}
      AWS_SECRET_ACCESS_KEY: ${{ secrets.AWS_SECRET_ACCESS_KEY }}

    steps:
    - name: Checkout Code
      uses: actions/checkout@v3

    - name: Setup Terraform
      uses: hashicorp/setup-terraform@v2
      with:
        terraform_version: 1.5.0

    - name: Terraform Init
      run: terraform -chdir=infrastructure init

    - name: Terraform Plan
      run: terraform -chdir=infrastructure plan -out tfplan

    - name: Terraform Apply
      run: |
        terraform -chdir=infrastructure apply -auto-approve tfplan | tee tf_output.txt
        INSTANCE_PUBLIC_IP=$(grep 'instance_public_ip =' tf_output.txt | awk -F ' = ' '{print $2}' | tr -d '"' | head -n 1 | tr -d '\n')
        echo $INSTANCE_PUBLIC_IP > tf_output.txt
        echo "INSTANCE_PUBLIC_IP=$INSTANCE_PUBLIC_IP" >> $GITHUB_ENV

    - name: Upload Terraform Output as Artifact
      uses: actions/upload-artifact@v4
      with:
        name: tf_output
        path: tf_output.txt
Additionally, we will use Linux commands to retrieve the IP address assigned by AWS. This address can be found both in the runner logs (thanks to the Terraform output object) and in the artifact that we will generate. An artifact is a file created at the individual workflow level, which we can download after the workflow has successfully completed.
After adding the workflow in .github/workflows, we can commit the changes, push them to the repository, and then run the workflow.
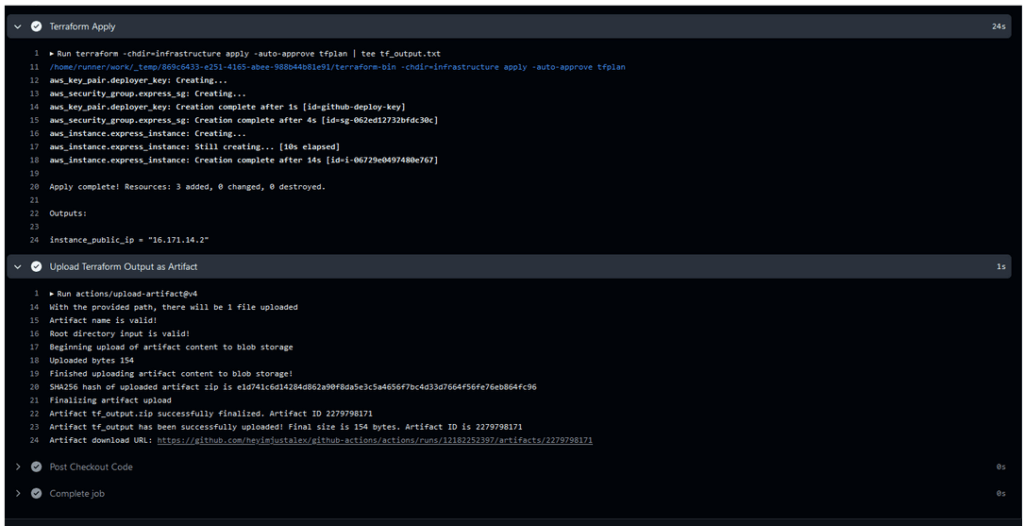
Figure 18 – Workflow Executed, Which Created Our EC2 Instance and Uploaded the Public Key to the Server. This Allows Us to Log in to the Provided Address Using the Command: ssh -i key ec2-user@ip-address
Storing the state in the S3 bucket allows us to use Terraform both from the local system and from the runner. Setting up the workflow with Terraform enables infrastructure deployment with a single click. Additionally, if we use the terraform plan command, we can check the configuration. This helps us identify whether someone has modified the server settings from the UI (configuration drift) and ensures that our configuration matches the current state.
To automatically deploy our simple application to our server, we will add another job to our workflow with tests. This job will perform the deployment if the tests pass. As input from the user, we will take the server’s IP address (obtained from the artifact of the first workflow) and the port on which the application should run. To achieve this, we will create another YML file, which will look as follows:
name: Test & Deploy
on:
  workflow_dispatch:
    inputs:
      instance_ip:
        description: 'EC2 Instance Public IP'
        required: true
        type: string
      port_number:
        description: 'Port number'
        required: true
        type: int
jobs:
  test:
    runs-on: ubuntu-24.04
    steps:
      - name: Checkout code
        uses: actions/checkout@v3

      - name: Set up Node.js
        uses: actions/setup-node@v3
        with:
          node-version: 18

      - name: Cache node_modules
        uses: actions/cache@v3
        with:
          path: node_modules
          key: ${{ runner.os }}-node-${{ hashFiles('**/package-lock.json') }}
          restore-keys: |
            ${{ runner.os }}-node-

      - name: Install dependencies
        run: npm ci

      - name: Test the code
        run: npm test

  deploy:
    runs-on: ubuntu-24.04
    needs: test
    steps:
      - name: Checkout code
        uses: actions/checkout@v3

      - name: Setup SSH private key for deployment
        run: |
          echo "${{ secrets.AWS_SSH_EXPRESS_PRIV_KEY }}" > private_key.pem
          chmod 600 private_key.pem
          ls -la

      - name: Copy files to EC2 instance using SCP
        run: |
          # Export EC2 instance IP from user input
          INSTANCE_IP=${{ github.event.inputs.instance_ip }}

          # Copy the code to the EC2 instance using SCP
          scp -o StrictHostKeyChecking=no -i private_key.pem -r . ec2-user@$INSTANCE_IP:/home/ec2-user/app

      - name: Deploy on EC2 instance
        run: |
          INSTANCE_IP=${{ github.event.inputs.instance_ip }}
          PORT=${{ github.event.inputs.port_number }}  # Port passed as input

          # SSH into EC2 with the environment variable
          ssh -t -o StrictHostKeyChecking=no -i private_key.pem ec2-user@$INSTANCE_IP << EOF
            set -e  # Fail on any error

            # Update the system and install Node.js (Amazon Linux 2023)
            sudo yum update -y
            curl -sL https://rpm.nodesource.com/setup_18.x | sudo bash -
            sudo yum install -y nodejs

            # Navigate to the app directory
            cd /home/ec2-user/app

            # Install dependencies
            npm install

            # Stop any existing application
            sudo pkill -f "node app/index.js" || true

            # Export the environment variable
            export PORT=$PORT

            # Start the application with sudo and fully detach
            echo "Starting application on port \$PORT"
            nohup sudo PORT=\$PORT npm start > app.log 2>&1 & disown

            # Wait briefly to ensure the application starts
            sleep 5

            # Verify the application is running
            if ! sudo lsof -i :\$PORT; then
              echo "Application failed to start on port \$PORT"
              exit 1
            else
              echo "Application is running successfully on port \$PORT"
            fi
            # Cleanly exit the SSH session
            exit 0
          EOF

      - name: Clean up SSH key
        run: rm -f private_key.pem
We added comments to the script so that the purpose of each command can be understood. Here, we use commands to retrieve the private key from the secrets object, then log into the server and deploy a working application using SSH, along with a few other commands. Notice that we use the directive needs: test, which means that the deployment will only start if our code passes all the tests first. This is necessary because, by default, separate jobs run concurrently, i.e., at the same time. After adding the YML file, committing, and pushing it, we start the workflow. Additionally, we use caching to speed up the execution of the workflow if our dependencies in package.json haven’t changed.
If everything was done correctly, the result should look as shown in the screenshot below.
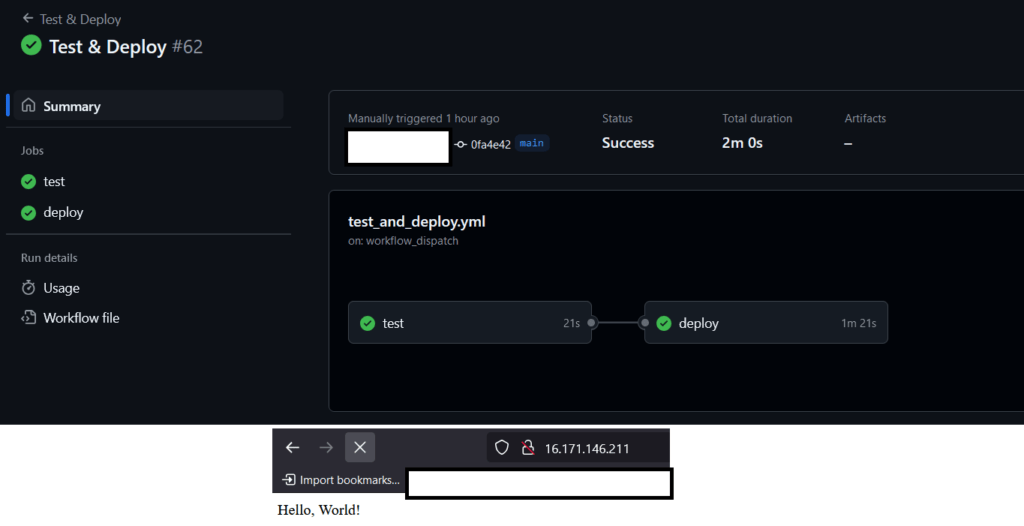
Figure 19 – Workflow Executed, Two Jobs are Dependent on Each Other, as Shown in the Figure. The Application Should Be Available at Our IP Address.
Today, we showed you how to deploy an application using GitHub Actions and how to leverage AWS and Terraform for this purpose. The example above is purely educational. In a production environment, such a deployment could be expanded to include the use of containers, aws-cli console, clusters, appropriate branching in the repository, code scanning (SAST, SCA), and properly configured rulesets that restrict the deployment of unverified code. All the code and configurations are available in our repository. Thanks, and we’ll see you next week in another post!

Green Data Centers – How to Choose an Eco-Friendly IT Partner?
A Guide for Companies Looking for IT Providers Using Energy-Efficient Infrastructure and Renewable Energy
Green IT

Helm for the Second Time – Versioning and Rollbacks for Your Application
We describe how to perform an update and rollback in Helm, how to flexibly overwrite values, and discover what templates are and how they work.
AdministrationInnovation
Helm – How to Simplify Kubernetes Management?
It's worth knowing! What is Helm, how to use it, and how does it make using a Kubernetes cluster easier?
AdministrationInnovation